Configure Azure AD integration
Configuration: DOC -> Administration -> Accounts -> Azure AD
Azure AD integration synchronizes selected groups and their members from Azure AD to DriveLock. The first step to make this work is to complete some configuration steps in Azure AD, and then paste the resulting data into the appropriate text fields in DriveLock Operations Center (DOC).
-
Configuration steps in Azure AD
-
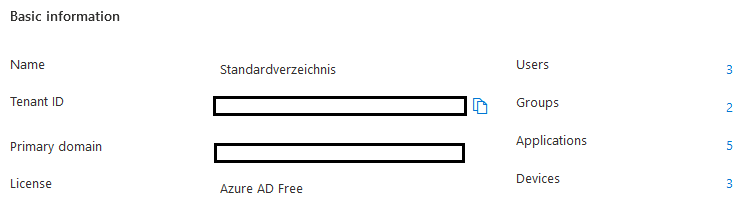
Specify settings under "Overview"
The following data from the Azure AD overview is required for synchronization. Make a note of the tenant ID and primary domain.
-
Registering and configuring the application
Create a new application in the "App registrations" section and note the "Application ID (Client ID)" from the overview page.
-
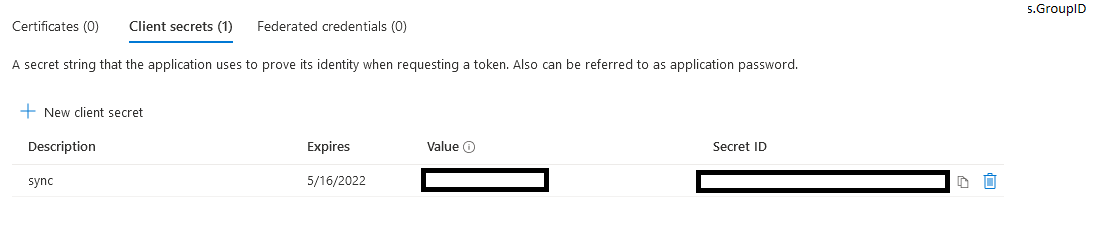
Generating a client secret
Create a new client secret in the Certificates & Client secrets section. You need the complete content from the "Value" column.
-
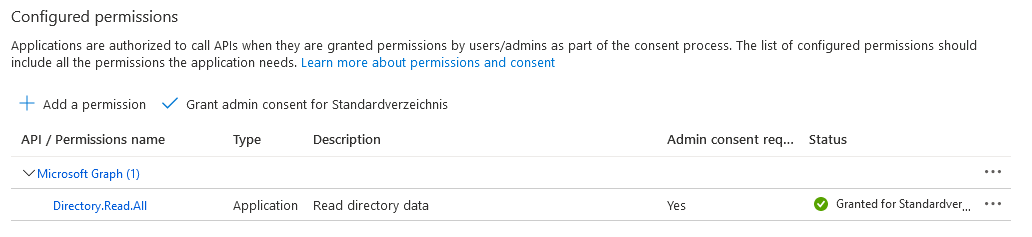
Setting permissions
In the "API permissions" section, assign the permissions as shown in the figure:
-
-
-
Select groups
Select the groups you want to synchronize. Synchronization includes all groups and the subgroups contained in them.
The synchronization takes place as follows:
-
once a day by default,
-
by right-clicking on an Azure AD group and clicking the Synchronize data with Azure now menu command, or
-
by selecting an Azure AD group in Group Management and clicking the Synchronize data with Azure now menu command.
Tip: If you want to manage your groups entirely on the Azure AD side, you can create an "AAD Sync Group" that includes all the groups you want to sync. Then you only select this group on the DriveLock side.
-
-
SAML configuration
You can optionally link a SAML configuration to the Azure AD configuration. This enables logging in with Azure AD users who have been assigned permissions because they belong to an Azure AD group.